The process of creating a rootstand explained
http://bonsaidisplay.blogspot.nl/
Have you ever made a Bonsai rootstand? Until a year ago, I had no experience with it either! With some creativity, exercise and patience the results will get better and better. This article will explain the basic steps involved, with many images to describe the process of creating a rootstand. Enjoy reading.
It all starts with a nice piece of wood. I used a trunk of a chestnut, but you can also use a wood block. I had to dry it for one year before I could use it. When I use a trunk, I try to use the accents of that trunk, for example when there were branches on the trunk use these in your composition.
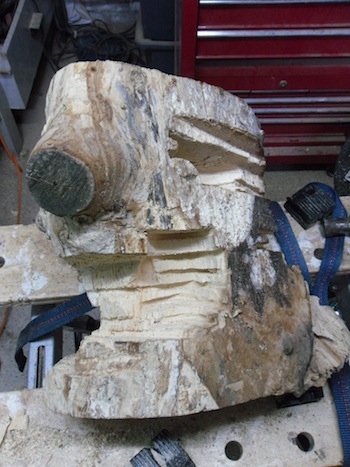

First, create a shape roughly with a saw or if you make bigger stands a chainsaw, it makes work easier.
The top and bottom have to be right above each other, if not, the stand will have no stability.


With a power drill holes are drilled randomly, you can drill as many holes as you like.
If you make more holes, the roots will have a finer look, like a spider web.
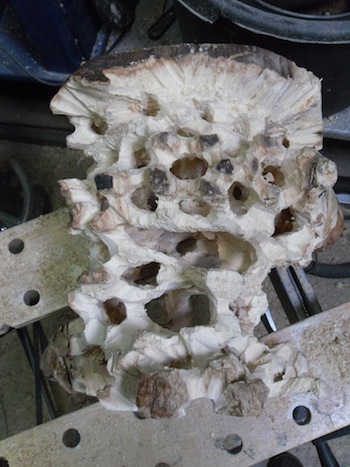

The holes are hollowed with a 3d drill, it removes the wood inside.
But be careful using this drill, because when you drill to far, it can influence the stability of the stand.
To make holes larger I used a carving tool (dremel or one with a flexible shaft) and flute spiralbits.

The spiralbid works very fast, like a saw, but be careful as the hole can become too large or wood will be removed where legs are wanted.
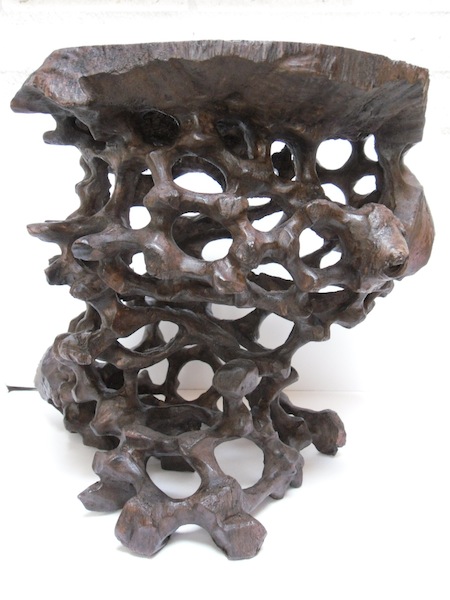
After rasping and sanding, the stand will be dark oak colored
I Always use water stain in different colors. First try them on another piece of wood before using it on your stand, so you are sure it is the tint you want. And last but least, I wax the stand. Every time you wax your stand the color will become deeper. I am using furniturewax because scratches and spots can be removed easily. When wood has a beautiful grain and color you can also rub it with Oil.
It took about 40 hours to create this bonsai stand, so if you see prices of stands like this, do not be surprised they are expensive.